You’ll start by setting up multiple mirrors and gathering guards in sizes #1, #2, and #7 for proper fade progression. Section your damp hair by pinning the top away, then create baseline guidelines below the jawline using a #0.5 or #1 guard with rocking motions. Master the close-to-open clipper technique—progressively opening your lever with each stroke to blend seamlessly between guard sizes. Work both sides symmetrically, inspect under natural light, and document any adjustments needed for future refinement.
Set Up Your Fade Clippers, Guards, and Mirrors
Before you’ll need to assemble the right tools and arrange your workspace strategically. Select a Wahl Elite Pro clipper for reliable power and self-sharpening blades that deliver snag-free performance. Gather guards in various sizes—#1, #2, and #7—essential for executing proper fade progression. A zero-gapping clipper guarantees clean guidelines.
Position multiple mirrors to achieve 360-degree visibility of your head’s sides and back. Align mirror angles to cross-check cuts both horizontally and vertically. Use a handheld mirror to inspect nape details. Confirm bright lighting eliminates shadows on your guidelines. Keep your detail trimmer accessible for precise edge work around the ears and neckline.
Prepare additional supplies: a spray bottle for dampening hair, a cape or towel for protection, a comb for sectioning, and a brush for removing clippings between guard changes. Like safety razor blades, clipper blades require proper maintenance and regular blade changes to maintain peak cutting performance and prevent tugging or irritation. Professional clippers often feature adjustable taper levers that allow you to customize blade tension for different hair types and fade techniques. This setup ensures precision and accessibility throughout your cut.

Durable Molded Construction: Crafted using high-quality molds, not 3D-printed, ensuring superior durability and resistance to wear and tear

High-Grade Nylon Build: Crafted from durable, flexible nylon designed to withstand daily use while providing a smooth, comfortable glide equal to original guards.

High Quality: Constructed from robust nylon material. Flexible and sturdy like the original.
Prepare and Section Your Hair
With your clippers, guards, and mirrors positioned strategically, you’re ready to prepare your hair for cutting. Start by cleaning your hair to eliminate product buildup, then apply hair dampening techniques using a spray bottle for ideal straight lie-down. Damp hair allows clippers to glide smoothly without snagging. Comb downward thoroughly, working from ends to roots to detangle knots and guarantee even distribution.
Next, employ sectioning methods by dividing your top hair from the sides and back using your comb. Create a clear parting line around the parietal ridge, then pin the top section away to prevent interference. These clean divisions establish precise access to fade areas and facilitate seamless blending later. Understanding clipper guard numbers will help you select the appropriate guard for each section of your fade. When working on contours, use an underhand grip for better control as you progress through different sections. Avoid soaking your hair to maintain control throughout the process. Proper sectioning is essential for managing the cutting process effectively and ensuring the fade transitions smoothly from one area to another.
Create Your Fade Baseline and Guidelines
Once you’ve prepped and sectioned your hair, you’re ready to establish the foundational guidelines for your fade. Start with a #0.5 or #1 guard to create your initial baseline, working from the bottom up to approximately one inch high. Use a rocking motion to push the skin line upward, positioning your guideline below the jawline for proper neckline alignment. Keep the clipper blade flat against your head for even cuts. Create an arc shape behind each ear using your trimmer’s corner. Set multiple reference lines by adjusting your fade guide tool incrementally upward. Match guidelines on both sides precisely to guarantee symmetry. Rock the clipper slightly at the top to soften the line, then blend outward systematically. To maintain optimal blade performance and prevent overheating during your fade, remember to apply clipper oil regularly between sections. Employ trimmers for detail work around the ears and neckline to enhance the overall precision of your baseline.
Blend Using the Close-to-Open Method
Now that you’ve established your guidelines, you’ll use the close-to-open method to create a seamless gradient between lengths. Start with your lever fully closed at the guideline, removing maximum hair. Progress to the midway position, advancing slightly higher on each stroke. Finish with the lever fully open, flicking outward to blend dark spots.
Repeat this close-to-open sequence multiple times per guideline for evenness. Shorten your cutting stroke each time the lever closes to match the reduced hair length. These fade techniques require precision—tap lightly with the blade’s corner for accuracy, avoiding full crossings over guidelines. A structured approach to cutting hair ensures consistency in your technique and prevents uneven results.
Work both sides evenly, baby-tapping before advancing height. For optimal results, consider using professional barber trimmers that offer superior sharpness and ergonomics for detailed work. Similar to maintaining a consistent edge on precision tools, employ these blending tips patiently, performing multiple passes to achieve consistent gradient shifts throughout your fade.

Heavy Duty Motor - Our PowerDrive Plus heavy-duty motor delivers exceptional power for no-snag cutting and runs 15% cooler vs. our standard PowerDrive motor. This powerful electric shaver cuts through the thickest of hair with no snags or pulls
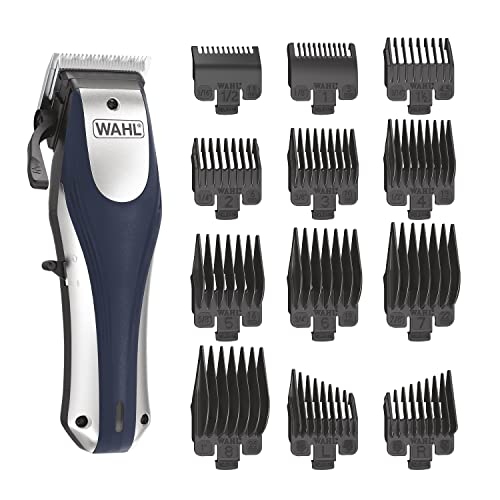
Cordless Operation – The power of a corded hair clipper with the convenience of a cordless; to use simply plug the clipper into charge and unplug when ready to use with cordless convenience
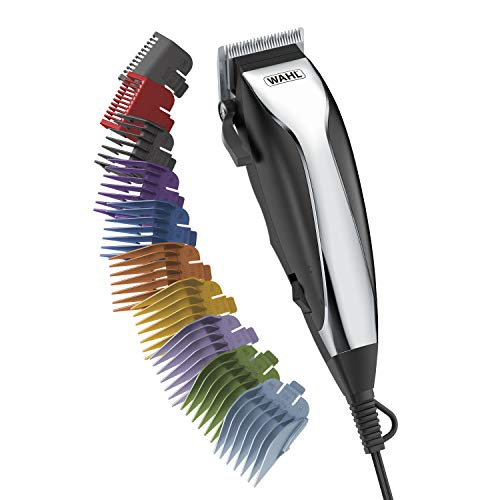
Multi-Cut Hair Clipper - Heavy duty motor for exceptional power and no-snag cutting; features an adjustable taper lever for easy blending and fading. This results in a very strong audible hum, but is completely normal to its operation. Don’t settle for a weak clipper.
Fade Your Back and Neckline
The neckline and back require careful preparation to guarantee your fade shifts smoothly into a clean, defined shape. Start by combing your hair dry and marking your starting point one to one-and-a-half inches above your natural hairline. Use closed clippers to establish your initial guideline, removing approximately half an inch of hair with an outward scooping motion. Repeat on both sides to maintain fade symmetry. Next, open your lever fully for the next guideline, then blend using half-closed and fully-closed positions until lines disappear seamlessly. Practicing this blending technique is essential for developing the precision needed to create seamless transitions between different clipper positions. To maintain optimal clipper performance while fading, apply specialized clipper oil to your blades before and after use to reduce friction and extend blade life. For best results, consider using contouring trimmers designed specifically for sharp edge work on necklines and sideburns. Finally, shape your neckline by starting behind your ear and pulling downward in one continuous motion. Use a comb to blend any remaining irregularities along your hairline. Remember to avoid stopping abruptly when fading, as this prevents harsh lines from forming in your finished cut.

【 Wet and Dry Shaver 】Our men's shaver offers the flexibility to be used dry or wet with foam or gel, and even in the shower. Whether you prefer dry comfort or wet convenience, our electric razor ensures easy cleaning between uses

WHAT'S INCLUDED: Pack of BIC Flex 5 Refillable Razors for Men, 1 Handle and 7 Cartridges

GROOM YOUR BEARD TO THE PERFECT SHAPE - No more expensive shaves from the barber! Get perfectly symmetric beard trimming lines in a matter of minutes! Simply line up our Beard Shaping Tool and follow our included grooming kit guide to get professional accurate shave lines in no time!
Spot Mistakes and Touch Up Problem Areas
Even the most careful fade can develop visible mistakes, so you’ll need to inspect your work thoroughly under natural light before considering the cut complete. Use multiple mirrors to identify unevenness between sides and check angles carefully.
Look for demarcation lines, patchy sections, and abrupt shifts that indicate insufficient blending. Problem areas commonly appear around the ears and crown where clippers may’ve skipped spots during rushed strokes. Dull or dirty clippers can hurt hair and lead to poor cutting performance, making it essential to maintain your blades before attempting corrections. For precision fading work, professional-grade options like Wahl models are designed specifically for blending and achieving seamless transitions.
To correct issues, use your taper lever for micro-adjustments between guards. Overlap guards gradually to achieve smooth blending where harsh lines formed. Cross-check both sides by running clippers in opposite directions to catch remaining inconsistencies. Consider using tools with linear blades for control when making detailed adjustments around sensitive areas.
Take photos under natural light to spot details you’d otherwise miss. Re-blend problem areas gradually rather than removing excessive hair at once. Brush blades after each use to ensure optimal performance when making these precision adjustments.