
You’ll master safety razor leg shaving by following key techniques. First, prepare your skin with hot water and exfoliation. Apply pre-shave oil and lather with a moistened brush. Hold the razor at a 30-40 degree angle, letting its weight do the work. Shave upward with short strokes following hair growth. Use extra care on knees and ankles with adjusted angles. Finish with cold water rinses, alum block application, and moisturizer. Uncover thorough strategies for preventing ingrown hairs and maintaining your blade for flawless results.
Prepare Your Skin and Lather Properly
Before you’ll need to properly prepare your skin and create an adequate lather. Start your pre-shave preparation by taking a hot shower or soaking in a tub to soften your skin and hair. Exfoliate your legs with glycerin soap to remove dead skin and reduce irritation. Apply a small amount of pre-shave oil, massaging it into the stubble for lubrication. Pre-shave oils with carrier oils like jojoba provide sebum-mimicking smoothness that enhances razor glide and reduces irritation.
For effective lather techniques, use an almond-sized dollop of cream on a moistened shave brush. Whip the lather in a bowl or directly on your leg section until it reaches a meringue-like consistency. Work in sections, lathering one area at a time to prevent drying. Use a shaving stick to supplement lather on specific areas as needed, maintaining warmth throughout the process. Invest in a sturdy shave brush to create a proper lather with quality cream or soap that protects your skin during the shaving process.

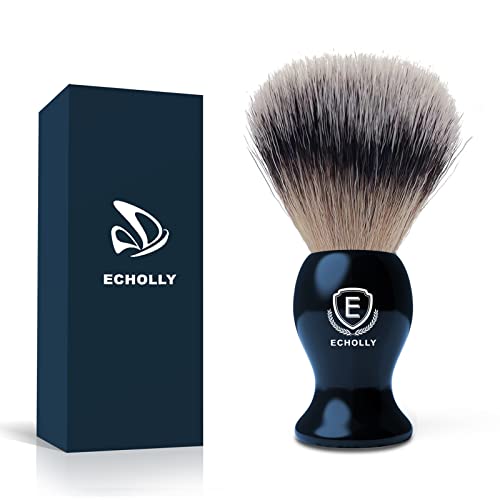
✔️PREMIUM SHAVING BRUSHES WORTH MORE THAN IT COST-Most shaving brushes if the quality is premium, the price always high. Echolly have a simple answer--our shave brush only need half price, but give you a luxury brush. Best Entry Level Shaving brushes for men.
Hold Your Safety Razor at the Right Angle
The angle at which you hold your safety razor dramatically impacts shaving effectiveness and skin irritation. You’ll want to maintain a 30-40 degree angle from your skin’s surface for ideal blade engagement. Hold your razor like a pen, gripping the handle loosely and farther down to avoid excessive pressure.
Position the blade so it contacts skin between the safety bar and top cap. Listen for the correct engagement sound during your initial pass—this auditory feedback confirms proper angle adjustment techniques. Test blade engagement by feeling slight resistance without scraping. Frequently rinsing your blade during the process ensures effective shaving and prevents product buildup that can dull performance. Military grooming standards similarly emphasize that proper technique and maintenance ensure both effectiveness and comfort during personal grooming routines. Like stropping a straight razor, maintaining consistent cutting motion across each stroke preserves blade sharpness and prevents unnecessary irritation.
Let gravity guide the razor downward; apply no additional pressure. Your grip control tips should emphasize a relaxed hold throughout each stroke, allowing the razor’s weight to do the work while maintaining consistent cutting motion.
Perfect Your Safety Razor Stroke
Once you’ve mastered the correct angle, your stroking technique becomes the next critical factor in achieving a smooth, irritation-free shave. Your stroke patterns should follow your hair’s natural growth direction, starting from your ankles and working upward in slow, controlled movements. Use short strokes on straight leg sections to maintain control and adjust angles around contours and bony areas like shins. This approach reduces nicking risks considerably.
Let your razor’s weight do the work—avoid applying excess pressure by holding the handle loosely. Rinse your blade between strokes, using both edges. After your initial pass, re-lather and complete a second sweep, focusing on missed spots. Maintain steady rhythm throughout, keeping strokes light and deliberate to prevent skin irritation. For optimal results, consider using multiple passes with decreasing pressure to ensure even coverage, similar to techniques used in professional grooming. A smooth shave with controlled technique demonstrates confidence and style in your personal grooming routine. For optimal results around sensitive areas like the knees, reduce your pressure even further and use extra caution to avoid cuts and irritation in these vulnerable zones.

COMPLETE MEN'S SHAVING KIT: The Gentleman Jon Shaving Kit for Men is a comprehensive set that includes a safety razor, badger hair brush, alum block, shave soap, stainless steel bowl, and five razor blades - everything needed for a luxurious, comfortable and smooth wet shave experience. With its compact design, our product is also a suitable travel companion to those who value traditional shaving, ensuring a neat shave even while on the go.

COMPLETE MEN'S SHAVING KIT: The Gentleman Jon Shaving Kit for Men is a comprehensive set that includes a safety razor, badger hair brush, alum block, shave soap, stainless steel bowl, shaving stand, canvas & leather dopp kit, and five razor blades - everything needed for a luxurious, comfortable and smooth wet shave experience. With its compact design, our product is also a suitable travel companion to those who value traditional shaving, ensuring a neat shave even while on the go.

GET SMOOTH SHAVING EVERY TIME: The Kitsch Perfect Glide safety razor is a top-of-the-line tool designed for an exceptional shaving experience. This single blade safety razor delivers a smooth, close, and comfortable shave, making it one of the most reliable safety razors for daily grooming without the irritation often associated with multi-blade razors.
Shave Knees, Ankles, and Curved Surfaces Safely
Because knees and ankles feature irregular bone structure and prominent contours, they demand specialized technique to prevent nicks and irritation. Your knee techniques should employ a 30-35 degree angle, rocking the razor head down until the blade contacts skin. Use short strokes following knee contours precisely, letting gravity guide your movements without pressure.
For ankle strategies, maintain a 30-40 degree angle while maneuvering around ankle bones with deliberate, short strokes moving upward with the grain. Keep the razor positioned like a pen, testing your angle before making contact. Rinse your blade frequently to maintain efficiency across both areas. A single blade design prevents tugging and pulling on the skin during these delicate maneuvers. Safety razors like the Oui the People Sensitive Skin Razor feature weighted designs that help maintain proper angle control on curved leg surfaces.
Sharp blades like Feather minimize passes needed, reducing irritation risks. With-grain shaving on these curved surfaces prevents ingrown hairs and discomfort. Proper preparation with specialized foams can further minimize skin irritation and other common shaving issues. Patience during initial practice guarantees mastery of these challenging zones.

CLASSIC PRECISION: Classic edging precision for beard lines mastery including a closer shave, better control, and reduced skin irritation

Premium Razor: This Lord Sterling razor features a sleek and stylish design with a chrome-plated, zinc alloy handle for a comfortable and close shave.

Cool Down and Moisturize Your Legs
After you’ve mastered the delicate angles required for knees and ankles, you’ll want to immediately shift your focus to post shave care. Start by rinsing your legs thoroughly with a cold rinse to close your pores and remove remaining shaving cream residue. Pat your skin dry gently with a clean towel rather than rubbing, which prevents irritation on freshly shaved skin.
Next, apply an alum block across your legs to disinfect and tighten your skin while stopping minor bleeding. Wipe away any residue with a damp washcloth. For sensitive areas like the bikini line, consider using a skin-protect blade design to minimize nicks and irritation. Follow with an alcohol-free aftershave balm formulated specifically for post-shave recovery. Consider using an aftershave balm to calm and heal your freshly shaved legs, as this step is crucial for soothing irritation. Regular maintenance of your razor prevents fungal and bacterial growth that can compromise both the tool’s performance and your skin health. Finally, apply a moisturizing lotion or balm generously to lock in hydration and prevent razor burn or ingrown hairs. This complete routine guarantees ideal skin healing and comfort.

Premium 100% natural solid potassium alum block that completes your shave with a clean, barber-quality finish. This natural mineral astringent calms skin, tightens pores & helps stop nicks bleeding, leaving skin smooth & revived

Highly effective in controlling excess sweating.

100% NATURAL POTASSIUM ALUM: The Herbs Botanica Alum Block is composed entirely of pure, high-grade potassium alum crystal. This naturally occurring mineral block is completely free from synthetic chemicals, alcohol, parabens, and added fragrances.
Exfoliate Regularly to Prevent Ingrown Hairs
Regular exfoliation is essential to your safety razor routine, as it removes dead skin cells that clog hair follicles and cause ingrown hairs. You’ll experience significant exfoliation benefits by implementing consistent techniques into your regimen.
Exfoliate one to two times weekly using either physical or chemical methods. Body scrubs effectively clear pore-clogging debris, while glycolic acid lotions provide dual exfoliation and moisturizing benefits. You can also apply chemical exfoliant pads daily, adjusting frequency based on your skin sensitivity. For additional benefits, try dry brushing with a natural bristle brush to further prepare your skin and lower ingrown hair risk. Similar to how rotary and linear blade designs each offer distinct advantages in grooming tools, different exfoliation methods work better for different skin types. Maintaining even pressure during exfoliation helps avoid irritation and ensures consistent results across all areas of your legs.
For best results, combine multiple exfoliation techniques. Use a soft toothbrush or warm washcloth in circular motions before shaving. Focus on areas prone to ingrowns, such as shins and calves. This preparation softens your skin, reduces hair curvature, and minimizes buildup from shaving, ensuring smoother results with your safety razor.
Address Nicks and Irritation
Even with proper exfoliation and technique, you’ll occasionally experience nicks and irritation when using a safety razor. Nick prevention starts with maintaining the correct 30-degree angle and applying only light pressure—let the razor’s weight do the work rather than pressing into your skin.
If you do sustain a nick, rinse immediately with cold water to close your pores and reduce bleeding. Apply a styptic pencil or alum block directly to the wound for instant hemostasis. Follow up with an alcohol-free aftershave balm to provide irritation relief and soothe inflamed skin.
For persistent tugging that causes nicks, change your blade every three to five shaves. Dull blades require excessive pressure, increasing injury risk. Pairing quality shaving cream with sharp blades and proper technique minimizes cutting incidents substantially. If you experience chronic irritation despite proper technique, consider whether an electric shaver with skin-protected designs might be a gentler alternative for sensitive areas. To maintain your blade’s effectiveness, establish a stropping routine using leather to keep your razor in optimal condition. Establishing a comfortable routine rather than rushing through your shave also helps you maintain better control and awareness of problem areas.
Clean and Maintain Your Safety Razor
Your safety razor’s longevity and maintenance tips depend on consistent cleaning and maintenance. Establish a daily cleaning routine by rinsing your razor with warm water immediately after shaving, then disassemble and air-dry all components thoroughly.
For deep cleaning, soak disassembled parts in warm soapy water weekly or monthly, depending on your water hardness. Use a soft-bristled brush to gently scrub away soap scum and mineral buildup. Address stubborn deposits with a vinegar and water solution applied with a soft cloth. An ultrasonic jewelry cleaner offers an excellent alternative for thorough cleaning without manual scrubbing. After disinfecting, apply 3–5 drops of blade oil to metal components and run through a cycle to distribute the lubricant evenly.
Implement proper storage solutions by keeping your razor in dry conditions with the handle loosened between uses. To maximize your blade investment, replace your blade every 3-5 shaves for daily users to maintain optimal performance and prevent irritation. Razor longevity extends for decades when you prioritize regular maintenance intervals and allow internal components to dry completely before reassembly.
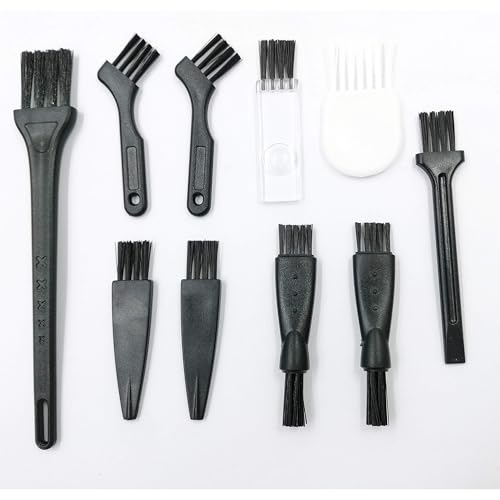

Electric razor cleaning brush

ShaverAid Electric Razor Shaver Cleaning Brush
Know When to Replace Your Safety Razor Blade
A dull blade won’t deliver the clean, close shave you’ve worked to achieve through proper technique and maintenance. Understanding replacement signs helps you maintain ideal blade longevity and shave quality.
Watch for tugging sensations, increased irritation, and incomplete cuts that leave stubble. These indicate dulling. Visual damage—nicks, bent edges, or rust—compromises performance. You’ll notice excessive friction and may require frequent alum block use for pain relief. Proper post-shave care can significantly extend your blade’s performance and durability between replacements.
Replace your blade after five to ten shaves on average. Daily shavers using a three-pass technique typically need weekly changes. Blade longevity varies based on hair coarseness and skin sensitivity. Thicker, coarser facial hair dulls blades faster than fine hair. Consider investing in a precision trimmer for detailed grooming work that complements your safety razor routine. Dull blades increase the risk of razor burn and ingrown hairs compared to the single sharp blade design that delivers closer shaves with less skin irritation.
Timely replacement prevents nicks, ingrown hairs, and infections while ensuring smoother results and reducing razor bumps from excess pressure.