Start by dampening your hair and applying quality shave cream for control. Select a #3 or #4 guard for your sides, positioning the clipper diagonally at your sideburns. Buzz upward toward your crown using light, continuous strokes without extra pressure. Follow your head’s natural contours, alternating directions on the second pass for a closer clip. Blend sections using a C-shaped motion with gradually decreasing guard sizes to eliminate harsh lines. Finish with a straight razor for crisp edges, then apply an aftershave with witch hazel or aloe to soothe irritation. Understanding how to navigate cowlicks and growth patterns will elevate your results considerably.
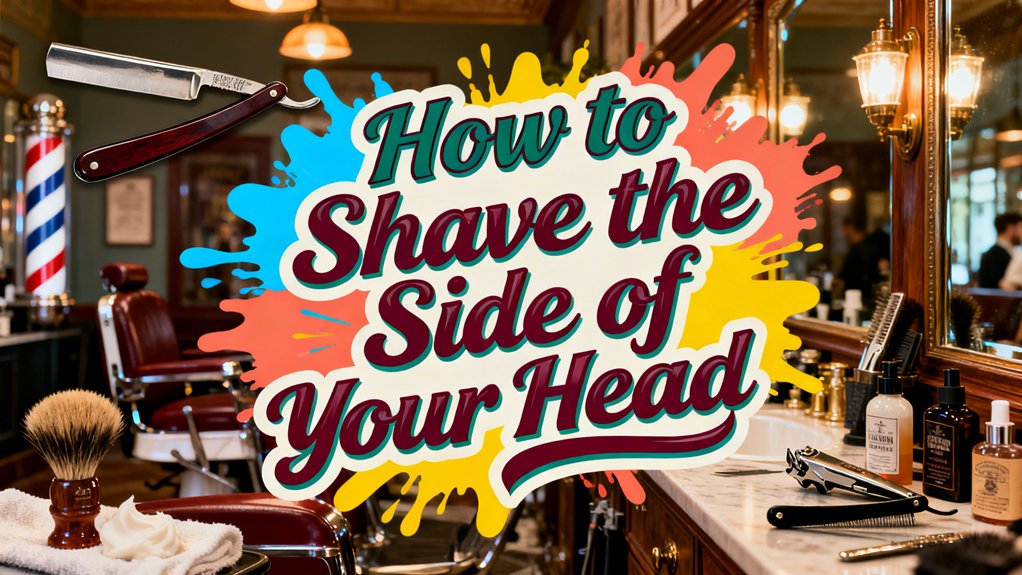
Gather Your Tools and Prep Your Hair
Before you start shaving the side of your head, you’ll need to select the right tool for your needs. Consider electric rotary shavers with independently flexing heads that adapt to your scalp’s contours, or explore dedicated head shavers engineered for skin-level cutting. Foil shavers and safety razors with pivoting heads offer viable alternatives depending on your preference. For specialized performance on sensitive scalp areas, hypoallergenic blade options are available that minimize irritation during the shaving process.
For hair preparation, dampen your hair slightly to soften it, making cutting easier. If using wet shaving tools, apply shaving foam or gel for added comfort. Guarantee your shaving tools feature flexible blade systems, ergonomic grips with rubberized areas, and water-resistant technology for maximum control during the process. A thick, quality shave cream is preferred over soap, gel, or oil, as thicker lather aids effective shaving and ensures smooth blade glide. For those seeking enhanced convenience and durability, electric trimmers with wireless charging capability offer extended use without frequent battery concerns.
Set up a dual mirror system beforehand—position one large mirror on your countertop at an angle toward your main bathroom mirror. This strategic setup eliminates blind spots when shaving side areas.
Pick Your Guard Size
With your tools selected and hair prepped, you’ll now determine which guard size matches your desired length and style. Guard length directly impacts your final result, so selecting guards requires understanding the relationship between numbers and hair length.
For side shaves, start with a #3 or #4 guard unless you prefer extremely close cuts. The #3 guard leaves 3/8 inch (10 mm), while the #4 guard provides 1/2 inch (13 mm)—both suitable starting points. If you want a tighter fade, drop to a #1 or #2 guard for lower sections. Keep in mind that sizes may vary by brand and blade geometry, so testing your specific clippers on a small section first ensures accurate results.
Consider your hair thickness: thinner hair benefits from #2-#3 guards to prevent scalp visibility, while thick hair handles #6-#7 better. For hard-to-reach areas around the sides and back, consider using contour-following designs that adapt to your head’s natural shape. Always begin with longer guards; you can’t regrow hair instantly if you cut too short. To maintain optimal clipper performance throughout your grooming routine, remember to clean your clipper blades regularly to remove hair clippings and debris that can affect cutting quality.
Clipping Upward: The Core Technique
Position your clipper diagonally rather than parallel to the head’s edges, starting at the sideburns before you initiate your upward motion. This clipper angle preserves length graduation while ensuring even coverage.
Execute your upward technique by buzzing continuously from the sideburns toward the crown in one sweeping motion. Work methodically from bottom to top, letting the clipper’s weight do the cutting without applying additional pressure. Follow your head’s natural contours as you glide upward.
Use light strokes and rely on touch to assess smoothness rather than sight. If you miss hair spots, perform upward strokes against the grain for better catch. For achieving the sharpest lines on the sides, consider pairing your clippers with a double edge safety razor for precise edge detailing after clipping. On your second pass, alternate directions on the sides for a closer clip. Lead with your clipper’s point for ideal control on rounded areas, and stretch skin taut with your free hand for a flatter surface. Inspect your dull blades for dullness to maintain optimal cutting performance, as dull blades can cause uneven results and scalp irritation. After each haircut, apply clipper oil to your blades to keep them performing at their best and prevent premature dulling.
Taper and Blend Your Sides
Once you’ve completed your upward clipping motion, you’ll need to create clean guidelines that establish your fade’s foundation. Start by creating a zero guideline at the nape using your shaver softly, then match this guideline visually around your head to the temples. Place your next parallel guideline one finger depth above using an open clipper.
Your fade styles choice—low, mid, or high taper—determines where you begin. Apply blending techniques by using a C-shaped clipper motion to guide into previous sections, stopping millimeter below the line. Open and close your clipper lever to remove harsh lines. Gradually decrease guard size upward with your comb, lifting hair for smooth shifts. To prevent discomfort and irritation, use short light strokes when working with your clipper. Focus on hair density and neckline shape to ensure optimal results throughout the taper. Work your nape after sides to see the fade clearly and prevent overworking the area. Consider preparing your neck area with warm water or towels beforehand to soften the skin and improve clipper glide.
Cut Hard Lines Into Your Part
Your fade’s clean foundation now calls for sharp, defined lines that’ll elevate your cut from good to professional. Master hard line techniques by using the corner of your trimmer blade for straight sections, applying light pressure to prevent rough tracks. Follow your natural hairline straight down behind the ear, cutting from bottom up for maximum sharpness. For curved lines, drop your trimmer angle slightly and use scooping movements with your open clipper blade at 1/2 setting, mirroring both sides precisely. After trimming, switch to scissors for edge cleaning, brushing down repeatedly to refine sharpness. Maintaining even tension throughout the process ensures precise results and prevents uneven lines. Keep your trimmer performing at peak sharpness by rinsing detachable blade parts under running water after each use to remove hair buildup. Replace your straight razor blade every 3-5 shaves to maintain the sharpness necessary for clean, precise lines. Finish with a straight razor at 90° angle, working left to right with short strokes while pulling skin inward for a taut surface.
Shave Your Sides for a Polished Finish
After you’ve established those hard lines, it’s time to shave the sides for a polished finish. Start by applying a generous amount of shaving cream to one side section, using a brush to create a soft lather. Work with the grain using light, smooth strokes and gentle pressure to minimize irritation. Rinse your blade frequently to prevent clogging. If you need a closer shave, re-lather and carefully proceed against the grain. Repeat this process on the opposite side, ensuring even coverage and consistent pressure throughout. For ideal scalp care, rinse with cold water to close pores, then apply an alcohol-free aftershave balm to soothe and protect your skin. Consider that hair removal creams offer an alternative method for removing unwanted hair on sensitive areas with less irritation than traditional shaving. Using sharp blades specifically designed for your grooming needs will help minimize irritation and deliver better results. Depending on your shaving frequency and hair growth rate, you’ll likely maintain these sides every one to two weeks for that polished appearance.
Adapt Your Technique for Cowlicks and Growth Patterns
Even with proper technique, cowlicks and irregular growth patterns can resist your shaving efforts and create an unpolished result. Cowlick identification requires observing directional swirls, particularly around your crown and neck areas. Once you’ve identified problem spots, adjust your shaving sequence accordingly.
For growth pattern adjustment, stretch skin on the opposite side of the cowlick to push hair outward, improving blade access. Experiment with directional passes—against-the-grain followed by with-the-grain typically produces superior results compared to reverse sequences. On neck whorls, angle your passes toward your Adam’s apple, then toward your nose.
Use the blade’s heel for hollowed areas. Consider finishing with a single-edge safety razor** after initial straight razor passes to ensure precise control and minimize irritation. Multiple light buffing passes work better than excessive pressure when addressing stubborn cowlicks. Before tackling difficult areas, exfoliating or taking a hot shower** can soften hair and make the shaving process more manageable. Remember that patience and practice are essential in developing a comfortable and effective shaving technique for these challenging areas.
Common Mistakes That Make Fades Look Patchy
While mastering cowlick management guarantees individual hairs sit correctly, the broader challenge of creating a polished fade lies in consistent blending across the entire shaved area. Poor blending causes harsh lines instead of smooth gradients between clipper lengths. Uneven taper results from rushing without checking multiple angles, leaving one side tighter than the other. Hair type mismatches occur when you select inappropriate fade design for specific growth patterns. To maintain a clean fade without excessive steps, focus on the existing blend for smoother transitions rather than setting new guidelines while fading. Inconsistent edge work—sloppy lineups or crooked beard trims—ruins symmetry. Tool errors and inadequate maintenance compromise blend quality considerably. Professional trimmers with magnetic guards and LED displays, such as the Bevel Pro, enhance precision and visibility for intricate design work. For barber-quality results, consider using tools like the Andis T-Outliner known for crisp edging and lining that create sharp, clean lines. Prevent these common mistakes through proper clipper lever adjustment, consistent section sizing, and establishing guideline anchors before cutting. Regular tool maintenance tips include cleaning blades and checking clipper functionality to guarantee professional results every time.
Lock in the Look: Aftershave and Styling
Once you’ve completed your fade, you’ll want to protect your freshly shaved skin and enhance your grooming results with the right aftershave product. Aftershave benefits include soothing irritation, reducing razor burn, and preventing ingrown hairs while maintaining a polished appearance.
Select products containing key ingredients like witch hazel, which acts as an astringent to prevent bumps, and aloe or allantoin to refresh and condition skin. Tea tree oil controls razor bumps effectively, while shea butter and jojoba oil provide essential hydration without stickiness. Electric razors with ultra-thin foils can also minimize irritation when paired with proper aftershave care. For optimal results, consider using specialized grooming products with anti-friction technology designed to reduce skin irritation during and after shaving.
Apply your chosen aftershave immediately post-shave to calm irritated skin. Modern formulations have evolved significantly since Edouard Pinaud created the first aftershave product, Lilac Vegetal in 1830, establishing the foundation for today’s advanced skincare solutions. Layer with matching cologne for a sophisticated scent evolution throughout your day. Choose formulas tailored to your skin type—balms for all complexions work best for curbing irritation and locking in your fresh fade.
Maintain Your Sides Between Cuts
Your fade won’t stay sharp without consistent maintenance between professional cuts. You’ll need to trim your sides every week and a half to manage new growth effectively. Establish a maintenance frequency that prevents your sideburns from becoming puffy while keeping your overall look polished.
For ideal sideburn symmetry, use the Frankenstein Test by placing your index fingers on both sideburns to confirm they’re level. Line the bottom straight across parallel to the floor, then gently taper the edges with appropriate guard settings.
Between cuts, brush your sides down immediately after showering when hair’s wet. This prevents stray hairs from sticking up and compromises your fade. Apply edge control with a toothbrush and wrap a scarf around your head to lay sides flat, maintaining that sharp appearance until your next professional appointment. When trimming at home, use a quality trimmer with adjustable guards to ensure even results across both sides. Professional barbers often rely on precision trimmers like the Andis T Outliner for maintaining crisp edges and consistent results. For the best results, select a trimmer with quality blade materials like stainless steel to maintain precision on your fade.