Power down your shaver and disconnect it completely. Detach the foil head using the release buttons, then tap it gently on a hard surface to dislodge debris. Rinse the foil and cutter bars under warm water for about ten seconds, ensuring you clean both interior and exterior surfaces. For stubborn buildup, soak components in warm soapy water for thirty to sixty minutes. Disinfect with rubbing alcohol, air-dry completely, then apply one to two drops of manufacturer-recommended mineral oil. Replace your foil and cutters annually for peak performance—though there’s considerably more to maintaining ideal shaving results.
Prepare Your Shaver for Cleaning
Before you begin cleaning your foil shaver, you’ll need to power it down completely and prepare your workspace. Turn off your shaver and disconnect it from the power source—this critical safety precaution prevents accidental activation and protects internal mechanisms during disassembly.
Next, locate your shaver’s head release buttons on the sides and press them to lift away the foil head. Set up your cleaning area on a hard surface like a sink or countertop where you can safely handle small components.
Gather your supplies: a soft-bristled brush, warm soapy water, and a clean towel. Prepare a bowl of warm water for soaking delicate parts. Just as precision is important when working with grooming tools, using professional-quality brushes ensures you won’t damage the delicate foil during cleaning. For waterproof models, you can rinse components under warm water, but always verify your shaver’s water resistance rating before submerging any parts. Establish a regular cleaning schedule—weekly maintenance prevents hair and debris buildup, extending your shaver’s lifespan and maintaining peak performance. Remember to ensure the shaver is dry before reassembling all components to prevent damage to internal mechanisms.
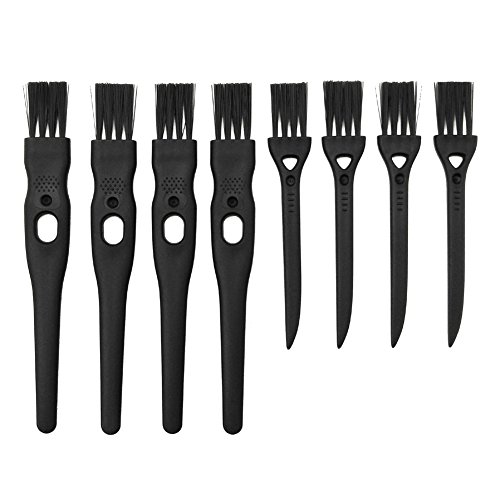
Very convenient to clean shaver / razor.

🍒High Quality Materials: Our shaver brush is made of high quality PP plastic and the brush head is made of high-quality nylon material Durable and sturdy the shaver brush is sturdy and not easy to fall off with good toughness The brush handle is designed with anti slip particles, providing a comfortable grip that will not easily fall off or deform.It can be used for a long time

ShaverAid Electric Razor Shaver Cleaning Brush
Remove Stubble From Your Shaver Head
Once you’ve detached the foil head, you’ll want to remove the bulk of loose hair and stubble before proceeding with deeper cleaning. Start by tapping the plastic frame gently on your sink or countertop—avoid striking the foils directly, as this damages them. This tapping-method effectively dislodges most debris immediately after use.
For stubborn clippings, employ compressed air from a can, using light sprays across the foil and cutter bar. You can supplement this with a soft brush on the cutter bar only, never on the foils themselves. Similar to beard grooming techniques that use boar bristle brushes to distribute oils and prevent damage, a soft brush on your shaver protects delicate components while removing debris effectively.
These essential shaver maintenance techniques utilize basic cleaning tools to remove loose stubble efficiently. Together, they prepare your shaving head for disinfection and deeper cleaning steps, ensuring maximum sanitation and performance. Regular maintenance prevents fungal and bacterial growth while keeping your shaver in optimal condition. A consistent cleaning routine not only maintains hygiene but also improves the overall performance of your shaver.
Rinse the Foil Head and Cutter Bars
With the loose debris removed, you’re ready to rinse the foil head and cutter bars thoroughly under running water. Use warm tap water for ideal rinse techniques, running the shaver for approximately 10 seconds while rinsing. This water temperature helps dissolve soap residue and loosens embedded hair fragments effectively.
Rinse both the foil frame’s interior and exterior surfaces completely. For nearly all Braun models, hot water provides quicker, more efficient cleaning. If you’ve removed the foil head separately, rinse it thoroughly under the tap. Proper preparation with warm water is essential for minimizing skin irritation during the cleaning process. The Braun Series 9 Pro Plus features an effective cleaning station that automates this rinsing process for convenience.
For stubborn buildup, soak removable blades and foils in warm soapy water for 30 to 60 minutes. Afterward, rinse under running tap water with the shaver running to flush away remaining debris and soap completely. After rinsing, allow disinfectant to dry completely before reassembling the tool to ensure sanitation and proper function.
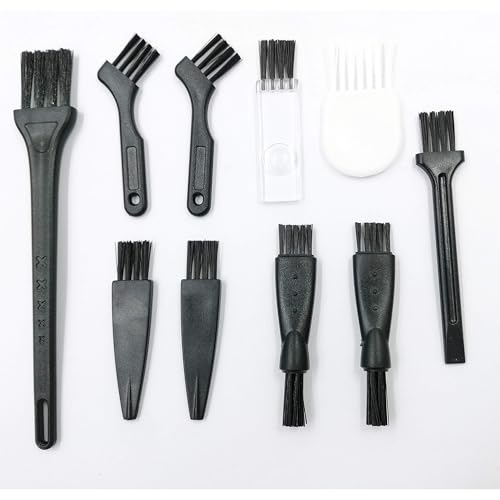

Complete Trimmer Maintenance Kit: Includes 100ml clipper cleaner, 100ml clipper oil, 6.1cm dual brush & 11.3cm long brush. Perfect for home, salon, daily shavers & moms. A thoughtful gift for any clipper owner

Rust Prevention – Prevents rust from forming & helps extend the life of the clipper & blades; can also reduce the likelihood of blades becoming dull
Remove Cream Buildup and Sebum Deposits
Even after rinsing, stubborn cream and sebum deposits often remain trapped in the foil’s grooves and crevices, hardening over time into resistant buildup. You’ll need targeted cleaning methods to dissolve these deposits effectively.
Soak your inner blades and outer foil in warm, soapy water for 30-60 minutes to break down hardened foam. For persistent residue, prepare a 1:1 vinegar-water mixture and soak for 20 minutes as a degreaser. You can enhance this by adding baking soda until fizzing, then soaking for one hour.
After soaking, use a synthetic shaving brush or old toothbrush to brush down both foil units thoroughly, eliminating trapped sebum and cream. Apply rubbing alcohol on a cloth for additional degreasing. Foil shavers like the Philips Norelco Bodygroom benefit from these meticulous cleaning practices to maintain their nick-free shaving performance. To prevent skin irritation like razor burn or ingrown hairs, maintain consistent cleaning practices. For optimal results, consider using an ultrasonic cleaner to remove deeply embedded residue that brushing alone cannot reach. Establish a weekly complete wash and dry schedule to prevent cream buildup escalation through consistent cleaning frequency.

PROFESSIONAL QUALITY CLEANING: Magnasonic has been the industry leader for over 15 years providing deep cleaning solutions to remove dirt and grime from the most hard-to-reach areas

THE ORIGINAL JEWELRY CLEANER | Since 1912, Blitz Has Been Making Your Silver Shimmer, Your Jewelry Glisten, and Your Accessories Spark Interest | With Premium Ingredients and Innovative Formulas, You Can Always Trust Blitz to Help You and Your Style Shine Bright—Without Harmful, Toxic, or Abrasive Chemicals

Professional Results at Home: This Professional Silver Cleaner delivers 42,000Hz ultrasonic waves to remove dirt and grime in minutes without damaging your valuables. Ideal for restoring the sparkle to engagement rings and necklaces.
Disinfect and Dry Everything
After you’ve brushed away the loosened buildup, you’ll want to eliminate any remaining bacteria and moisture that could compromise your shaver’s performance and hygiene. Your sanitation strategies should include multiple disinfectant choices tailored to your shaver type. Apply disinfectant spray generously, saturating the foils and cutter bars, then gently wipe down the top and sides. Alternatively, use isopropyl alcohol on a clean cloth to remove sebum traces effectively. For waterproof models, consider a vinegar soaking solution—mix equal parts warm water and vinegar for twenty minutes, optionally adding baking soda for enhanced cleaning. Regardless of method, rinse under running warm water afterward. Air-dry all components completely before reassembly to prevent rust and corrosion, ensuring your shaver remains hygienic and functional. For optimal disinfection, maintain proper wet contact time with your chosen disinfectant to ensure efficacy. Just as daily moisturization is essential for scalp health after shaving, keeping your shaver clean prevents irritation and ensures optimal performance. To avoid damaging the delicate foils, use a toothbrush for gentle contour cleaning during the disinfection process.
Oil Your Shaver Blades Every Few Days
You’ll want to oil your shaver’s blades every few days to maintain peak performance and extend blade longevity by up to 40%. Proper lubrication techniques reduce friction, preventing overheating and motor strain while easing your device’s workload by 25%.
Apply one to two drops of manufacturer-recommended mineral oil immediately after cleaning and drying. Distribute the lubricant evenly across the foil and moving components to protect metal from rust. Never use household oils or WD-40, as these create buildup that damages delicate coatings. Lubricant should be applied immediately after cleaning and drying to protect metal parts from rust and reduce friction on internal components.
For blade maintenance, avoid over-oiling—excess application attracts hair and debris, causing 60% more maintenance issues. Stick to minimal drops for smooth operation. Users with coarse hair or sensitive skin should lubricate more frequently for ideal results and reduced irritation. While beard grooming practices vary across different religious and cultural traditions, religious grooming standards may influence personal shaving choices and maintenance routines. Proper post-shave care with appropriate moisturizers can also help minimize skin irritation when using electric shavers regularly.


Replacement lubricating oil suitable for all hair clippers and beard trimmers

Rust Prevention – Prevents rust from forming & helps extend the life of the clipper & blades; can also reduce the likelihood of blades becoming dull
Replace Your Foil and Cutters Every 12 Months
While regular oiling keeps your blades lubricated, the foil and cutters themselves wear down over time and require periodic replacement. You’ll notice replacement signs through reduced cutting efficiency, skin irritation, and visible dullness in the foil alignment. Bent or broken cutter teeth demand immediate attention.
Replace your foil head and cutters annually for peak performance. The replacement benefits include maintaining a close shave without irritation, preventing motor strain, and reducing skin irritation risk by 60%. After equivalent wear from daily use, your shaver loses efficiency to hair buildup. If you’re subscribed to a regular maintenance plan, you can easily cancel your subscription if you prefer to purchase replacement parts individually rather than through automatic shipments. Foil shavers are particularly effective at leaving a protective stubble buffer that minimizes razor bumps compared to other shaving methods. Regular cleaning spray designed to thoroughly remove sebum from shaver parts facilitates easy residue removal and extends the life of your components between replacements.
To replace, turn off your shaver and push the side buttons to release the foil head. Lift upward and remove the foil and cutters separately. Tap the head on a hard surface to clear debris before installing new parts. Realign the foil precisely with the cutter surface for restored performance.

Restore pro-level cutting power – Bring your ProFoil back to peak performance with a precision replacement foil and cutter designed for barbers, stylists, and serious groomers who rely on clean, consistent results.

Packaging Includes: 1 foil head and 2 cutters.

【Precisely Compatible】 This replacement head compatible with Babylisspro FX3/FXX3S professional high speed double foil shaver. Utilizing a precise 1:1 mold design, the clips fit tightly, allowing the shaver to restore its optimal shaving performance.